A couple of weeks ago I finally unveiled the collected results of my long-gestating Sedition Wars Project. I hosted a few games using the figures and terrain that I have been modeling for the last 19 months.
The Strain I had some vacation time this summer, so I finally painted up 28 Strain models of various types. There are 21 Necroforms, basically human corpses animated by the dreaded nano-virus plague, There are 5 2nd-level Exoforms (evolved creatures, like in Resident Evil): 3 Stalkers (close combat types), and 2 Quasimodos (large creatures with an acidic shooting attack). Rounding them out are a pair of 3rd level Exoforms: a Scythe Witch (a kick-ass close combat expert), and a Brimstone (a big creature with a nasty gun in its chest).
I also picked up a couple of zombie paint sets from
Army Painter:
Warpaints Zombicide Core Zombie Set
Warpaints Zombicide Toxic/Prison Set
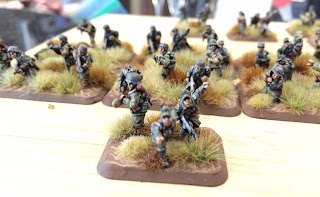
I painted the 21 Revenants as if they were animated corpses, with muscles showing through rents in their greenish-tinged skin. With colours such as "Scaly Hide" and "Crusted Sore", I hope I have given these an adequate aura of putrefaction and fear.
Below, some of what I call "Lefty's" - Revenants with a HUGE left arm and a protruding right eyeball.
![Camera Roll-1571]()
![Camera Roll-1572]()
![Camera Roll-1573]()
"Skeletors" - more traditionally zombie-like Revenants.
![Camera Roll-1595]()
![Camera Roll-1596]()
"Dunce's" - these are the most disturbing to me; their brains and skulls have collapsed and have basically been absorbed into a tentacle thingy.
![Camera Roll-1597]()
![Camera Roll-1598]()
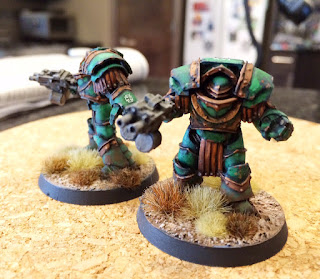
Below, from L-R, a Stalker, three Revenants, and a Quasimodo take cover behind a container. The 2nd level, evolved Strain are painted in more traditional human flesh tones as if they are "alive", to help differentiate them from the Revenants.
![Camera Roll-1627]()
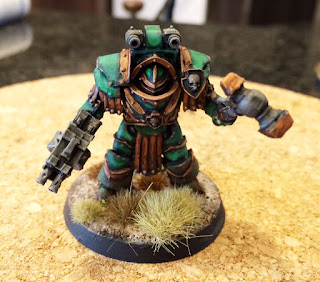
The Brimstone, mounted on a 50mm diameter base, painted basically like a huge, animated temple dog.
![Camera Roll-1643]()
Two views of the Scythe Witch, painted as if she has a chitinous carapace; I did not want to go the metallic route with the armoured plating on her body. She's also very tall, noting that she is mounted on a 25mm base..
![Camera Roll-1644]()
![Camera Roll-1645]() The Game Board
The Game BoardMy Hawk Wargames Urban Battle Board finally arrived last month from
Games and Gears. The package contained six 2'-square plastic boards that fit together. I used four in the photo below, for a 4' x 4' table. The streets and crosswalks already came painted. There would have been even more painting and weathering on the boards, but the company lost its entire shipment to a flood in China last year. This was a Kickstarter fulfillment, so they sent out these replacements with the basic paint job. I really like the detail and texture. Some airbrushing and oil washes will set these right in the future.
![Camera Roll-1582]()
![Camera Roll-1586]() First Sedition Wars Game
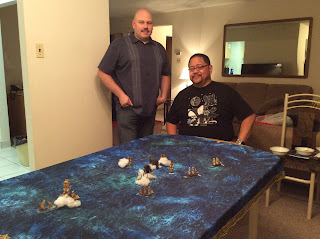
First Sedition Wars Game A couple of weeks ago I hosted my first Sedition Wars game using the new models and terrain. Eight (!) Conscripts dropped by for the inaugural game.
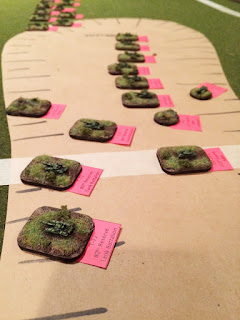
For setup, the Vanguard Samaritans deployed in the street behind the non-burning armoured truck, needing to get to the square blockhouse to the north, and then had to scan the area for survivors for 4 turns. The Strain had to kill or infect all the Vanguard. Below, Conscript Keegan overlooks the board. The long pale rectangular terrain piece is the rail for a mag-lev train.
![Camera Roll-1599]()
Below, Keegan and Duncan contemplate a flanking attack by hordes of Strain.
![Camera Roll-1600]()
The Vanguard Grenadier bravely sacrificed herself; though wounded and bleeding, she stayed to fire off a grav grenade, which stalled a bunch of Revenants in their tracks. She succumbed to her wounds, leaving behind a corpse counter.
![Camera Roll-1601]()
As Duncan and Dallas look on, several Strain converge on the blockhouse, only to be gunned down by Vanguard lasers.
![Camera Roll-1602]()
Clouds of nano-virus mark dead Revenants; however, the nano-virus could still move and infect the Vanguard!
![Camera Roll-1603]()
Too little, too late. Though several Vanguard were infected, they were able to complete the scan and win the game.
![Camera Roll-1604]()
Other dead soldiers that evening. Mmm, beer!
![Camera Roll-1605]() Play Testing
Play TestingLast week Conscript Mike came by to help playtest the next Sedition Wars scenario in the Outbreak Campaign. We made some errors in the rules during the previous game, which we went thorough carefully for the play test.
This time, the Vanguard have to break through the Strain ranks to catch the mag-lev train, which will arrive at the end of turn 4, and leave at the end of turn 6. The winner is the side with the most models on the train!
![Camera Roll-1634]()
Below, a couple of infected Vanguard Samaritans support an advance through Taco Bell.
![Camera Roll-1621]()
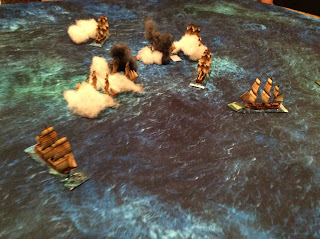
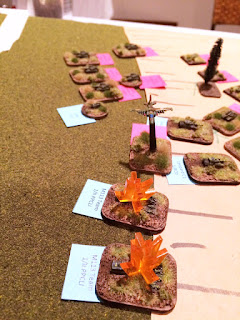
An incendiary grenade fired indirectly finds it mark, igniting several Strain. Burn, baby, burn!
![Camera Roll-1622]()
![Camera Roll-1623]()
A Quasimodo guns down a Samaritan with a corrosive acid spray!
![Camera Roll-1624]()
Surviving Vanguard grimly carry on.
![Camera Roll-1625]()
Several Revenants take cover behind the mobile hospital module.
![Camera Roll-1626]() Infinity The Game
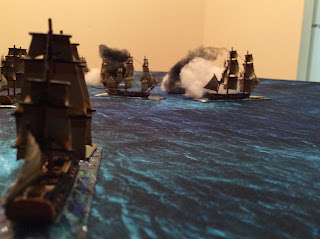
Infinity The GameLike Dallas` Stalingrad terrain, this table can be amortized over several games and gaming systems.
To that end, DerekY came over for the first
Infinity game on the new table.
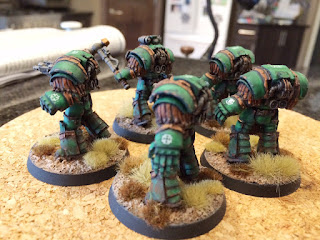
Below, some Pan Oceana Fusiliers (proxied by my Vanguard) seize an objective, ahead of Derek`s Nomad in the far doorway.
![Camera Roll-1635]()
A Nisse Sniper provides covering fire, as a Trauma Doc approaches another objective.
![Camera Roll-1636]()
Automatic weapons fire shredded the hair salon, leaving two unconscious soldiers!
![Camera Roll-1637]()
The Trauma Doc managed to hack the objective, despite not having any hacking skill!
![Camera Roll-1638]()
The Nomads pulled back and managed to hack two objectives in the final turn, for the win!
![Camera Roll-1640]()
Infinity required a denser terrain setup (including another store, another truck, some street barricades, and more cargo containers). I will probably use denser terrain for Sedition Wars, too.
![Camera Roll-1641]() Sedition Wars Project - Phase Two:
Sedition Wars Project - Phase Two:In order of priority, the following modeling projects are in queue:
- MDF mag-lev train for Scenarios 3 and 4 of the Outbreak Campaign
- Strain: more Revenants (for tabletop play we need double the number used in the board game version of the game), and bigger nasties including a 4th-level Grendler and a 5th-level Cthonian.
- Vanguard: a resin Gnosis battle-suit from Studio McVey, 6 civilians from Hasslefree and Corvus Belli (also usable as High Value Targets for Infinity), several corpse models to replace the cardboard counters, and more Vanguard Samaritans and A.I. drones
- Other Terrain: More MDF buildings
Nineteen months into this 12-month project (yeah, I know), I`ve managed to finish 52 models and a couple of dozen buildings and terrain pieces. For me that`s a significant amount of effort. I`m glad it turned out pretty well.